In this article, we will look at two simple ways to reset network settings in Windows 11. The first method is using the Network reset section in Settings, and the second is using the command line with special commands.
Restoring factory network settings helps solve many different internet connection issues, fix Wi-Fi or Ethernet connections, resolve DNS-related errors, eliminate problems after removing a VPN, and fix other similar issues in Windows 11.
But first, I want to answer two common questions.
What Does a Network Reset Do, and What Happens After Resetting?
I’ve noticed that many people are concerned about the consequences. A network reset removes all user-configured network settings and reinstalls network adapters. Additionally:
- The DNS cache is cleared, and the DNS configuration is updated.
- The IP configuration is refreshed.
- Winsock and TCP/IP settings are reset.
- Proxy settings are reset (as they often cause internet access issues).
- Network services are restarted.
In most cases, you won’t even notice that the reset has occurred. The most inconvenient part for me personally is that all saved Wi-Fi networks and their passwords will be deleted after the reset. You will need to reconnect to the Wi-Fi networks you previously used on your computer. However, you can see the saved passwords for the necessary Wi-Fi networks in Windows 11 settings before performing the reset.
Sometimes, issues with VPN and similar applications may occur. But even if that happens, simply reinstalling the application should fix everything.
Resetting Network Settings via Windows 11 Settings
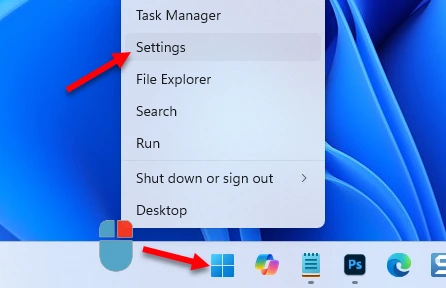
To open Settings, press Win + I, or right-click the Start Menu and select Settings.
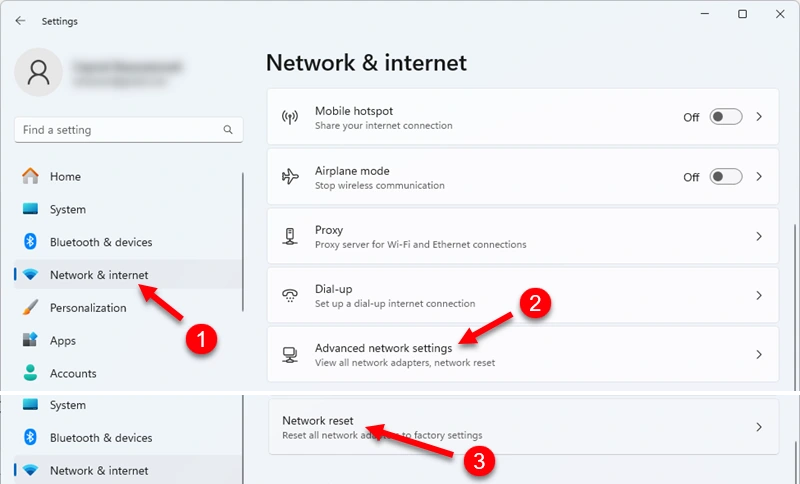
Go to Network & internet → Advanced network settings → Network reset.
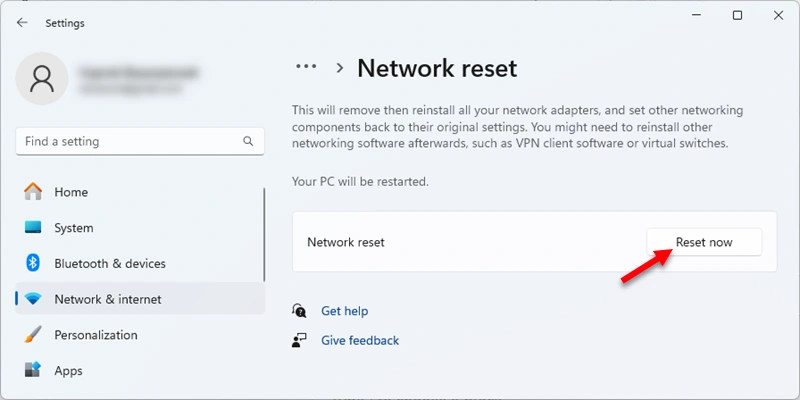
Click the Reset now button.
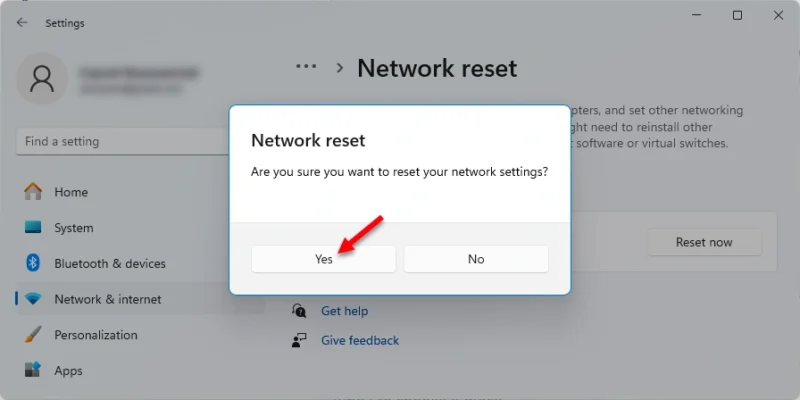
A message will appear: “Are you sure you want to reset your network settings?” Click Yes to continue.
You will see a notification that Windows will shut down in a few minutes. After the specified time, your PC will restart, and the factory network settings will be restored.
This is the easiest method, which I personally use and recommend to everyone. In the second part of this article, we will look at the method using the command line.
Resetting Network Settings Using Command Line or PowerShell
The commands can be executed both in Command Prompt (CMD) and Windows PowerShell (Terminal). However, you need to run Command Prompt or PowerShell as an administrator. I have tested all the commands on my computer. I also noticed that saved Wi-Fi networks and passwords were not deleted after executing these commands. While the reset through Settings (as shown above) removes known Wi-Fi networks.
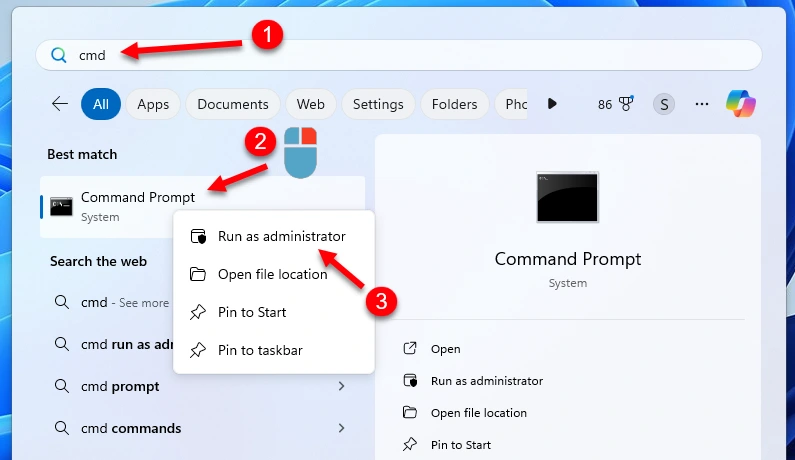
To run Command Prompt as an administrator, open the search bar by pressing Win + S and type “cmd” in the search field. Then, right-click on Command Prompt and select Run as administrator.
If you want to launch Windows PowerShell, right-click the Start Menu and select Terminal (admin).
First, I recommend clearing the DNS cache and updating the DNS configuration. To do this, copy and execute these commands one by one (press Enter after each):
ipconfig /flushdnsipconfig /registerdns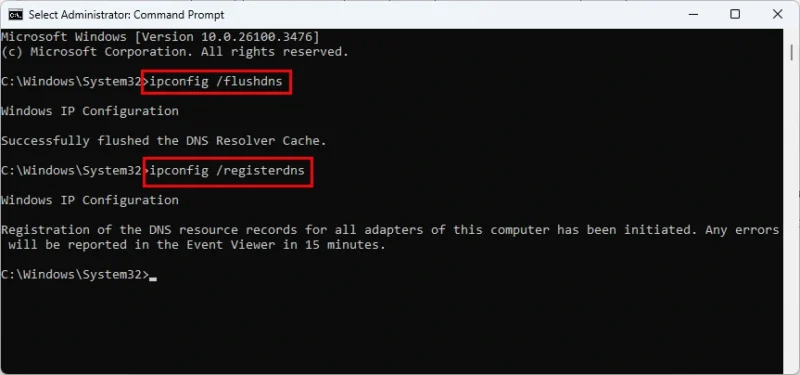
I recommend starting with these commands, as they might resolve your connection issue without needing to perform a full network reset. After running them, restart your computer and check if the problem is resolved.
The following commands refresh the IP configuration in Windows 11. Execute them in order:
ipconfig /release
ipconfig /renew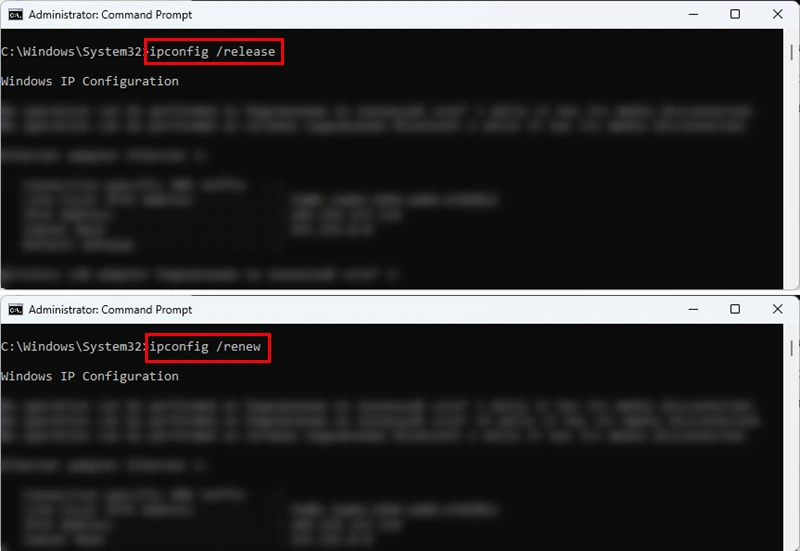
After running the first command, internet access (if available) may temporarily disappear. However, after running the second command, the network adapter will obtain a new IP address, restoring internet access.
This command resets Windows Sockets (Winsock) parameters, clearing additional network configurations, including Ethernet and Wi-Fi settings.
This command can be very effective in resolving internet connection issues:
netsh winsock reset
After running this command, restart your computer to complete the process.
This command resets all network adapter settings in Windows 11:
netsh int ip reset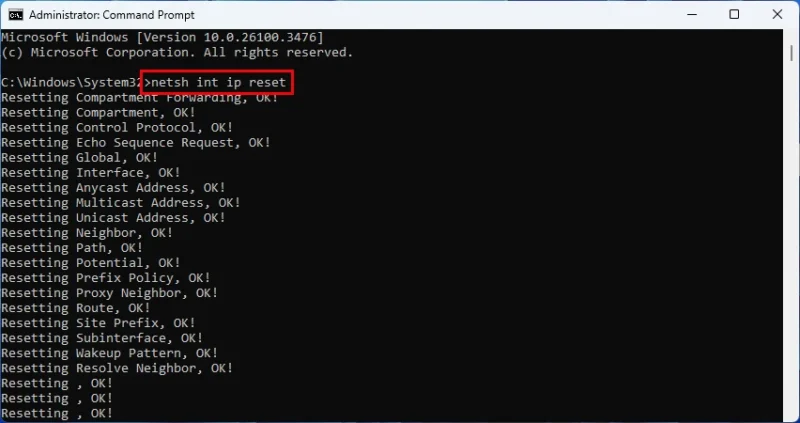
After executing this command, a message will appear: “Restart the computer to complete this action.” So, restart your computer and check the result.
Since incorrect proxy settings often cause internet access issues, I recommend resetting them using this command:
netsh winhttp reset proxy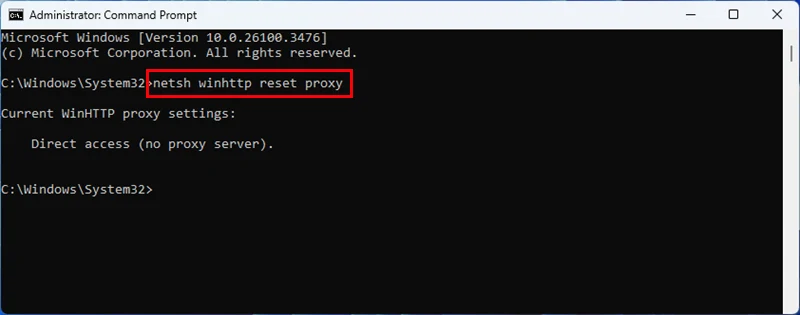
Be sure to restart your computer after executing all these commands.
Why Doesn’t a Network Reset Work?
Believe me, it works. If you executed all the commands correctly and especially performed the reset through Settings, then your network settings were definitely reset. However, this may not always resolve the issue you were trying to fix. Unfortunately, not all internet connection problems can be solved this way.
If a network reset in Windows 11 didn’t fix your issue, your connection still doesn’t work, or you see an error, write a comment, and I’ll try to help you.